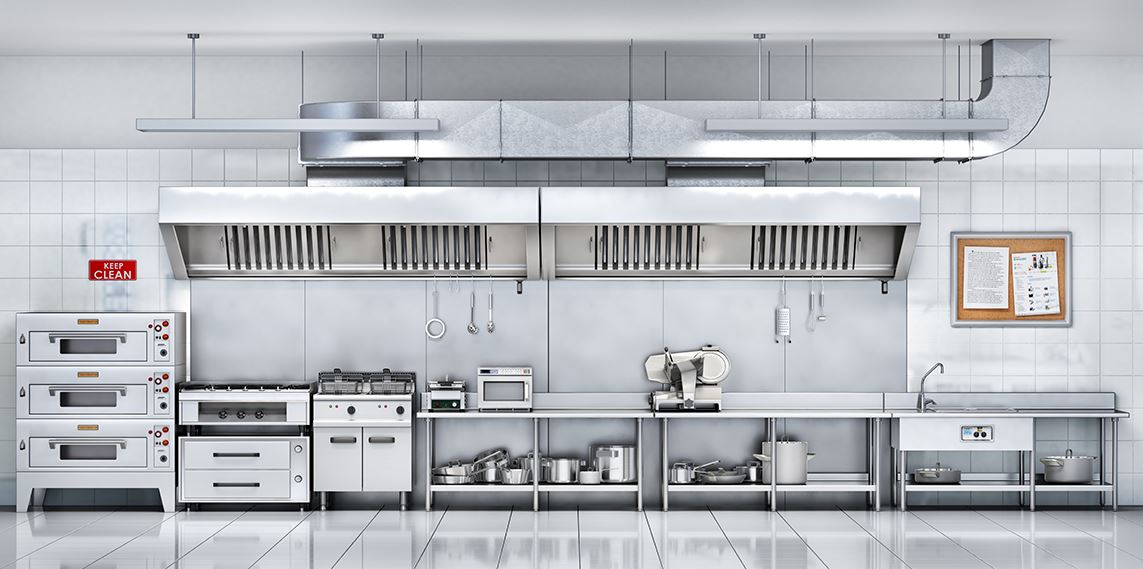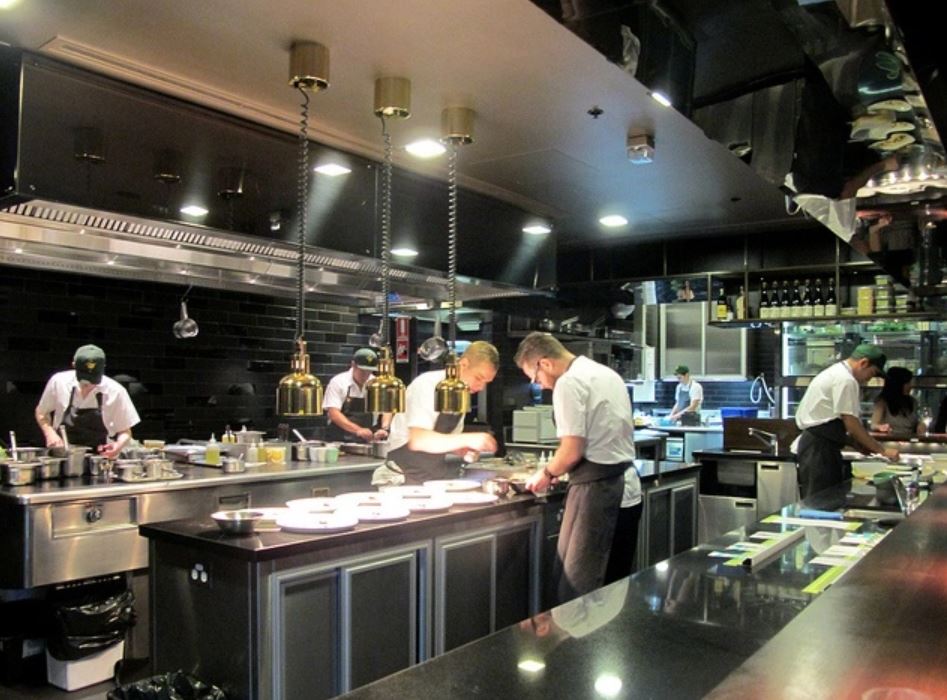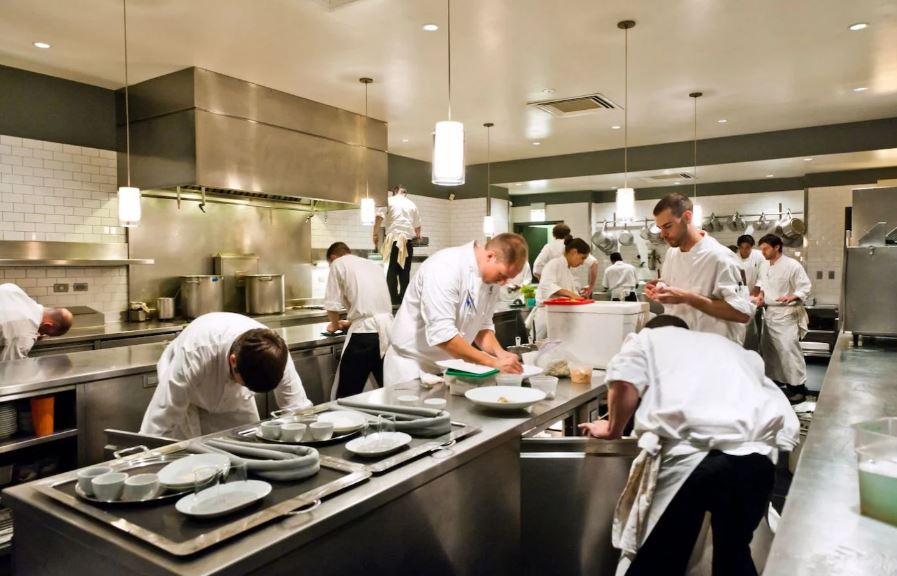
Opening a coffee shop with commercial equipment is a thrilling business opportunity that blends the culinary art of offering delectable delicacies with the art of brewing coffee. The process starts with careful preparation, which includes everything from legal requirements and market research to acquiring an ideal location and designing a welcoming interior. Purchasing top-notch commercial food equipment, such as kitchen appliances, coffee makers, and espresso machines, is essential to guaranteeing a smooth operation. A well-thought-out menu that accommodates a wide range of palates and dietary requirements, a knowledgeable and enthusiastic staff, and an effective marketing plan may turn your coffee shop into a warm and inviting retreat for both foodies and coffee lovers. Sustaining equipment, keeping an eye on stock, and providing consistently high-quality service are essential for long-term success in the cutthroat world of coffee shop ownership. Although it involves careful planning and execution, opening a coffee shop can be a gratifying endeavor. Here’s a step-by-step tutorial to get you going: Market Research and Business Plan: Conduct thorough market research to understand the local coffee shop industry, your target audience, and your competition. Create a detailed business plan that outlines your concept, budget, funding sources, and financial projections. Legal and Regulatory Requirements: Register your business and obtain all necessary permits and licenses. Comply with health and safety regulations, including food handling permits. Location and Space: Find a suitable location for your coffee shop. Consider foot traffic, proximity to other businesses, and your target market. Choose a space that can accommodate your coffee equipment, food preparation area, seating, and storage. Commercial Food Equipment: Invest in high-quality commercial food equipment, which may include: coffee makers and grinders Brewers of commercial coffee Freezers and refrigerators Stoves and ovens blenders and food processors Dishwashing appliances Display cabinets for food and pastries Layout and Interior Design: Plan an efficient layout that allows for smooth workflow in the kitchen and barista area. Design the interior to create a comfortable and welcoming atmosphere for your customers. Menu Development: Create a menu that includes coffee options, pastries, sandwiches, and other food items. Consider dietary restrictions and trends when designing your menu. Suppliers and Ingredients: Establish relationships with suppliers for coffee beans, pastries, and other food ingredients. Ensure a consistent supply chain for your products. Staffing and Training: Hire and train staff, including baristas and kitchen staff. Provide training on food safety and customer service. Marketing and Branding: Develop a brand identity and logo. Create a marketing plan that includes social media, local advertising, and promotions. Inventory Management: Implement an inventory management system to track ingredients and supplies. Minimize waste and manage costs effectively. POS System: Invest in a reliable point-of-sale (POS) system to manage orders and payments efficiently. Utilities and Services: Ensure you have the necessary utilities like electricity, water, and internet services. Set up waste disposal and recycling systems. Quality Control and Testing: Test your coffee and food products for taste, quality, and consistency before opening. Soft Opening: Have a soft opening to work out any operational issues before the grand opening. Grand Opening: Plan a grand opening event to attract customers and create buzz. Operations and Maintenance: Regularly maintain and service your equipment to ensure it operates efficiently. Monitor your business’s financial performance and adjust your operations as needed. Customer Feedback: Encourage customer feedback and use it to improve your offerings and service. The secret to a successful start in the world of coffee shops is meticulous attention to detail, dedication to providing outstanding customer service, and a sincere love of coffee. Purchase All Your Commercial Kitchen Equipment From The FED (Foodservice Equipment Depot) Explore our diverse selection of high-quality commercial kitchen equipment for all your culinary needs. Enjoy a seamless online ordering experience, ensuring fast and frictionless access to professional-grade food service equipment. Shop at our Restaurant Supply Online Store.
Commercial Kitchen Equipment
Selecting an Appropriate Commercial Meat Mixer
To make sure the best commercial meat mixer fits the unique requirements of your company, it is important to carefully weigh a number of aspects. Here are some important things to take into account when choosing a commercial meat mixer, whether you own a restaurant, butcher shop, or other type of food service establishment: Capacity: As certain how much meat you plan to process each time. Choose a commercial meat mixer that can accommodate your anticipated workload without overworking or underusing the machine because they come in a variety of sizes. Variety of Mixers Compact in design, tilt-head mixers make it simple to add ingredients or remove combined meat from the mixing basin. They work well in smaller-scale endeavors. Bowl-Lift Mixers: These can handle greater amounts of meat and are made for more demanding uses. Motor Power: Take into account the machine’s motor power, as this directly affects the types of meats it can mix and how well it mixes them. Larger batches or tougher meats mix well with motors with more power. Mixing Speed: Select a mixer that has adjustable speed settings, so you may change the speed to suit the consistency you want and the kind of meat you’re processing. There are slow and fast speed settings on some mixers, which are helpful for various jobs. Material and Durability: Choose a mixer composed of corrosion-resistant, easily cleaned food-grade materials like stainless steel. It must also be constructed to endure frequent, intense use. Make sure the mixer includes safety features like emergency stop buttons, overload protection, and safety interlocks to avoid mishaps. Cleaning Ease: Take into account how simple it is to clean the machine. Smooth surfaces and detachable parts are helpful for efficient and thorough cleaning. Size and Space: Verify that the mixer’s measurements match the space in your kitchen that is available. When not in use, it should also be simple to transport or store. Accessories: Certain mixers come with a variety of accessories, such as meat grinder attachments, which can increase the functionality of your kitchen appliances. Warranty and Support: Verify the manufacturer’s warranty offerings and make sure they provide sufficient customer service and replacement components. Budget: Establish a spending limit and search for the best meat mixer within that range. Recall that long-term savings on maintenance and repair expenses could justify the purchase of a better mixer. Reviews and Advice: To learn more about the dependability and performance of particular models and brands, read reviews and ask other industry experts for advice. Brand Reputation: Opt for a brand that has a solid reputation for manufacturing high-quality commercial kitchen appliances. Reputable brands frequently have a history of producing dependable goods. It’s critical to evaluate your unique requirements and thoroughly compare the various commercial meat mixers on the market before settling on a model that best meets the demands of your company. Purchase All Your Commercial Kitchen Equipment From The FED (Foodservice Equipment Depot) Explore our diverse selection of high-quality commercial kitchen equipment for all your culinary needs. Enjoy a seamless online ordering experience, ensuring fast and frictionless access to professional-grade food service equipment. Shop at our Restaurant Supply Online Store.
Exploring the Benefits of Using a Salamander Broiler in Your Restaurant
There is plenty of heavy-duty kitchen equipment to explore, but today, we focus on the salamander broiler. Let’s delve into precisely what this device is, its expected benefits, and where you can find it. What is a Salamander Broiler? First things first – what is broiling? It refers to a food preparation method of placing food close to the heating element to brown, char, or caramelize it quickly. It provides meals with more intricate flavours and creates excellent textures for the perfect mouth feel. These devices use infrared ceramic broilers for several applications, from grilling the perfect crackling on a pork chop to melting cheese flawlessly onto dishes like casseroles. Place these standalone appliances on a countertop or mount them to a wall. Salamander broilers take up little space and are usually not much bigger than a microwave. These appliances also offer higher heat capacity than broiling inside ovens and can handle numerous tasks. Benefits of Using Salamander Broiler Cooking Equipment These devices offer a few benefits to your kitchen, whether you operate on strict food schedules or have the same dishes available all day. Here is a list of the benefits you’re likely to experience the most when using these devices: Fast Turnaround Times Given the heat capacity of these devices, you can expect fast turnaround times. Naturally, fast service is always better in a commercial kitchen, busy or otherwise. The heat settings are also easy to adjust, from gentle broiling to severe heat, depending on what you need. Clears Up Space A salamander broiler is a much smaller device than an oven, so it takes up less space. However, the leading spatial benefit comes from not using an oven to broil dishes. Once the food is ready for the broiler, remove it from the oven and transfer it to the salamander broiler. Variety of Uses Salamander broilers work well for many tasks – here are some examples: Melting cheese onto a casserole. Caramelizing sugar on desserts. Toasting sandwiches to a mouth-watering crunch level. Creating that sought-after crispy finish for steaks or other meat. Where Can You Find Commercial Salamander Broilers? At The FED, we offer an extensive collection of commercial kitchen appliances, including salamander broilers. Our Atosa ATSB-36 Salamander Broiler is for sale with a wall mount kit or brackets. These devices only have a one-minute preheat time, are entirely stainless steel, and have dual valve controls for independent operation of the left and right sides. Place Your Order Today or Browse More Appliances If you are ready to order a new salamander broiler, simply head to our product page and click ‘Buy it Now.’ We offer free shipping to most major Canadian cities, so don’t hesitate to enquire. Additionally, we offer single or monthly payment options to suit your specific requirements. Choose The FED for your commercial kitchen appliances and enjoy quality devices that can boost your production.
Good Handling, Sanitation and Work Safety Guidelines
In any industry that deals with food, following proper work safety, sanitation, and food handling procedures is crucial to maintaining the quality and safety of the items you serve as well as the health and wellbeing of your staff and clients. The following are important rules to abide by: Personal Cleanliness: Before beginning any task that could contaminate their hands, such as handling raw food or using the restroom, employees should always wash their hands thoroughly with soap and warm water. Managing and Storing Food: Tongs and cutting boards for raw and cooked food should be kept apart. Food should be stored at the right temperature to prevent bacteria from growing. Put perishables in the refrigerator right away. Food should be covered to prevent contamination. Sort stock so that older things are used first. Instead of thawing frozen goods at room temperature, use a refrigerator or cold running water. Sanitation and Cleaning: Make sure that all surfaces, tools, and utensils used in food preparation are regularly cleaned and sanitized. Observe appropriate dishwashing practices, which encompass cleaning, discarding, and disinfecting dishes and cutlery. Put food-safe disinfectants and cleaning supplies to use. Regularly clean the ceiling, walls, and flooring. Preventing Cross-Contamination: To avoid food cross-contamination, use chopping boards with contrasting colors. Keep ready-to-eat food and raw meats, poultry, and seafood separate. Educate staff members on the value of avoiding cross-contamination. Temperature Management: Make sure food temperatures stay within safe limits by checking and recording them on a regular basis. Food should be kept cold (below 40°F or 4°C) and hot (beyond 140°F or 60°C). To confirm temperatures, use food thermometers. Controlling Food Allergens: Label foods containing common allergies clearly and keep them apart. Teach employees to recognize and address queries from customers regarding allergies. Effectively address customers’ concerns around allergens. Cooking and Heating Safely: To destroy dangerous bacteria, cook food to the internal temperatures that are advised. Warm up any remaining food for at least 15 seconds to 165°F (74°C). Employee Education: All staff members should receive thorough training on food safety and cleanliness. Inform employees on a regular basis about safety rules and best practices. Ascertain that workers have access to supplies and equipment for safety. Termite Control: Put pest prevention measures in place, such as routine inspections, appropriate disposal of garbage, and caulking of entry spots. When necessary, hire professionals for pest control. Procedures for Emergencies: Create and disseminate emergency action plans for situations involving food, such as chemical spills, fires, or outbreaks of foodborne illness. Safety Tools and Protocols: Give workers the proper safety gear and instructions on how to utilize it. Preserve a tidy and secure workplace. Respect for Regulations: Make sure you are compliant by keeping up with local, state, and federal food safety requirements. Maintaining Records: Keep thorough records of staff training, cleaning schedules, and food temperatures. Frequent Examinations: Verify that policies are being followed by conducting self-audits and inspections, and take quick action to resolve any problems that arise. Interaction: Promote candid dialogue among employees about occurrences and safety concerns. Client correspondence: Inform clients on allergen awareness and procedures for food safety. Constant Enhancement: Always evaluate and enhance your food safety and sanitation procedures in light of user feedback, new regulations, and best practices from the sector. You can help avoid foodborne illnesses, uphold high standards, and guarantee a safe and healthy working environment for your staff by following these recommendations and encouraging a culture of food safety and cleanliness inside your institution. Purchase All Your Commercial Kitchen Equipment From The FED (Foodservice Equipment Depot) Explore our diverse selection of high-quality commercial kitchen equipment for all your culinary needs. Enjoy a seamless online ordering experience, ensuring fast and frictionless access to professional-grade food service equipment. Shop at our Restaurant Supply Online Store.
Pumpkin Cream Pie in a Chocolate Crust Recipe
Pumpkin pie is a classic and delicious treat for Halloween or the fall season. Here is a unique twist on the classic pumpkin pie recipe: recipe & picture by: Pumpkin Cream Pie in a Chocolate Crust Recipe – Melissa Clark (foodandwine.com) Ingredients 8 ounces chocolate wafer cookies (33 cookies) 1 stick unsalted butter (melted) 2 tablespoons sugar 1 pure pumpkin puree (5-ounce can) ¾ cup heavy cream 2 eggs (large) 1 tablespoon bourbon (brandy or apple cider) ½ cup light brown sugar (packed) 1 teaspoon fresh ginger (finely grated peeled) 1 ½ teaspoons ground ginger 1 ½ teaspoons ground cinnamon ½ teaspoon fine sea salt ¼ teaspoon nutmeg (grated) ⅛ teaspoon allspice (ground) 1 cup crème fraîche ½ cup heavy cream 2 tablespoons confectioners sugar Chocolate curls (see Note for garnish) Directions Make the crust In a food processor, pulse the cookies until finely ground. Transfer to a medium bowl and add the butter and sugar. Mix until well combined, then press into a 9-inch metal pie plate. Refrigerate for 30 minutes. Preheat the oven to 350°. Bake the crust for 8 to 10 minutes, until set. Transfer to a rack and let cool. Make the filling In a large bowl, whisk the pumpkin puree with all of the remaining ingredients until smooth. Scrape the filling into the piecrust and bake for 50 minutes to 1 hour, until the filling is set but slightly jiggly in the centre. Transfer to a rack and let cool completely. Make the topping In a medium bowl, using a hand mixer, beat the crème fraîche with the cream and confectioners’ sugar until soft peaks form. Spoon the topping over the pie, garnish with chocolate curls and serve. Equipment Required You’ll need a number of necessary appliances to make the ideal Pumpkin Cream Pie in a Chocolate Crust, which will guarantee a delicious and reliable dessert. Start with a top-notch professional stand mixer that will blend the velvety pumpkin filling to perfection with ease. To ensure a well-balanced and delectable flavor, exact measurements of the main ingredients require a sturdy and accurate kitchen scale. A professional food processor with a sharp blade for smashing the cookies and shaping the perfect crust texture, which will result in a rich chocolate crust. A pie plate is the ideal presentation. With the correct tools, you can quickly make a delicious Chocolate-Crust Pumpkin Cream Pie that will have them coming back for more. Purchase All Your Commercial Kitchen Equipment From The FED (Foodservice Equipment Depot) Explore our diverse selection of high-quality commercial kitchen equipment for all your culinary needs. Enjoy a seamless online ordering experience, ensuring fast and frictionless access to professional-grade food service equipment. Shop at our Restaurant Supply Online Store.
Batch This Apple and Bourbon Cocktail Recipe to Spice Up Fall Parties
Apple lovers, this one is for you. recipe & picture by: Apple Brandy Cocktail (foodandwine.com) Bourbon and apples are a combination made in heaven, and this delicious cocktail enhances the flavor of apples even more. The aroma of fresh apple pie permeates this cozy, autumnal bourbon drink made with sweet apple brandy, tart apple cider, and cinnamon syrup. The Bushels & Barrels cocktail can be served cold over ice or warmed up slightly over the stovetop or in a slow cooker for a comforting late-autumn drink. Make Ahead This apple brandy cocktail can be made up to 5 days in advance and stored in an airtight container in the refrigerator. Ingredients 2 cups apple cider (such as Red Jacket Orchards) 1 1/2 cups (12 ounces) bourbon (such as Four Roses) 1/2 cup (4 ounces) apple brandy (such as Laird’s) 3/4 cup fresh lemon juice (from 3 large lemons) 1/2 cup cinnamon syrup (such as Monin) 1/2 teaspoon Angostura bitters 16 whole cloves, for garnish Directions Combine apple cider, bourbon, apple brandy, lemon juice, cinnamon syrup, and bitters in a large serving pitcher. Stir well to combine, about 20 seconds. Refrigerate until well chilled, about 45 minutes. Remove the cocktail from the refrigerator and stir well to recombine. Divide the cocktail evenly among 8 ice-filled rocks glasses or copper mule mugs. Garnish each cocktail with two whole cloves. Equipment Required You need top-notch equipment that guarantees accuracy and efficiency to produce the ideal bourbon cocktail. Our ice machines are your hidden weapon, whether you’re a restaurateur trying to wow your customers or a bartender in a posh lounge. Constructed for optimal effectiveness, it generates a consistent flow of superior ice cubes or spheres, enabling you to pour glass after glass of the finest, most refreshing bourbon cocktails. To mix your components perfectly and present your drink with style, start with a high-quality cocktail shaker, preferably one that has a built-in strainer. To liberate the flavors of herbs and fruits without adding unwelcome bitterness, a robust muddler is necessary. Invest in an appropriate volume measuring jigger for measuring your bourbon and other ingredients. An ice crusher or Lewis bag with a wooden mallet can be a useful tool to get the perfect ice chill and dilution. Last but not least, don’t overlook the garnish to accentuate the appearance and fragrance of your bourbon cocktail. Purchase All Your Commercial Kitchen Equipment From The FED (Foodservice Equipment Depot) Explore our diverse selection of high-quality commercial kitchen equipment for all your culinary needs. Enjoy a seamless online ordering experience, ensuring fast and frictionless access to professional-grade food service equipment. Shop at our Restaurant Supply Online Store.
Crucial Restaurant Supplies in Calgary: Creating a Successful Environment
Restaurant proprietors and business owners can find great success in Calgary, which is well-known for its vibrant food scene and diverse culinary environment. Having the appropriate commercial restaurant equipment in Calgary is crucial to your foodservice business, regardless of whether you’re building a brand-new eatery or remodeling an old one. The need for great eating experiences is constantly rising, whether one is in one of the lovely neighborhoods or the busy streets of downtown. We’ll look at the essential restaurant supplies in this blog to make sure your business succeeds in this cutthroat industry. Industry Refrigeration: Any restaurant’s foundation is built on dependable commercial refrigeration equipment. Maintaining the proper temperature for perishable goods and beverages is essential in Calgary due to its year-round temperature fluctuations. To keep your ingredients fresh, spend money on freezers, reach-in refrigerators, and walk-in coolers. Food safety is ensured and waste is decreased with proper refrigeration. Cooking Utensils: The food scene in Calgary is renowned for its versatility, encompassing both foreign and steakhouse fare. You should have a range of culinary tools in your kitchen, such as: Commercial range ovens: For reliable cooking outcomes, you need high-quality ovens, whether you’re baking, roasting, or broiling. Charbroilers and griddles: A grill or griddle is a necessity for those tender steaks and hamburgers. Deep Fryers: ideal for frying chicken wings, French fries, and other foods. Combination Ovens: multipurpose appliances for simmering, boiling, and sautéing Food preparation tools: Effectiveness is essential in a busy commercial kitchen. To ensure consistency in your recipes and save time, invest in food prep tools such as mixers, dicers, slicers, and food processors. These tools can increase the productivity of your kitchen staff, which will benefit your restaurant’s entire operation. Dishwashing equipment: In the restaurant business, keeping the surroundings hygienic and clean is a must. Commercial dishwashers and sinks are crucial pieces of equipment for cleaning dishes, making sure your cutlery and dishes are spotless and prepared for serving. This gear is essential in Calgary, where there are strict regulations about hygiene. Dining room furnishings and equipment: Your customers make their first impressions in the eating area. Invest in tables, chairs, and bar stools that are both visually appealing and comfortable. Remember to include necessities like dishes, glasses, and silverware to create a formal dinner setting. HVAC and Ventilation Systems: An effective HVAC system is necessary to create a comfortable dining atmosphere year-round in Calgary’s harsh weather. It is essential to have adequate ventilation in the kitchen to get rid of extra heat and cooking smells. Make an investment in top-notch procedures to guarantee the welfare of your clients and employees. Although it takes careful preparation and investment in the correct equipment, opening a restaurant in Calgary is an exciting endeavor. Every piece of equipment, from food prep to refrigeration to dining room furniture to HVAC and Ventilation systems, is essential to the success of your restaurant. You may create an unforgettable dining experience and stand out in this vibrant culinary scene in Calgary by making an investment in high-quality commercial restaurant equipment. Purchase All Your Commercial Kitchen Equipment From The FED (Foodservice Equipment Depot) Explore our diverse selection of high-quality commercial kitchen equipment for all your culinary needs. Enjoy a seamless online ordering experience, ensuring fast and frictionless access to professional-grade food service equipment. Shop at our Restaurant Supply Online Store.
Quick Guide to Atosa Commercial Refrigerators Dixell Controllers
In today’s fast-paced restaurant industry, maintaining precise control over temperature is crucial for ensuring the quality and safety of your ingredients. Atosa commercial refrigerators equipped with Dixell controllers offer advanced temperature management features that empower you to keep your ingredients in their optimal condition. In this guide, we will walk you through the essential steps for setting and controlling temperatures using the Dixell controllers on your Atosa commercial refrigerators and freezers. Whether you’re a seasoned chef or a restaurant owner, mastering these controls will help you enhance the efficiency and performance of your refrigeration units. Let’s begin. Please note that your new food equipment has been calibrated, configured, and tested at the factory. If you wish to adjust these settings, we recommend consulting your dealer to ensure that any changes do not compromise your warranty. Setting Temperature on Commercial Freezers or Fridges with Dixell Controllers Static temperatures are the simplest way to ensure your fridges or freezers provide predictable cooling. You can set a static temperature in the following way: Press the SET button and hold it until the temperature value starts blinking. Use the UP or DOWN arrow buttons to increase or decrease the temperature to the desired number. Press the SET button again to finalize your decision and lock in the temperature. Setting the Temperature Difference With the “OT” Function The “OT” function on the Dixell controller allows you to set a temperature difference between the outside and inside reader. For example, if you place your temperature difference to two, and the temperature reader shows 38 degrees, the inside temperature will be 36 degrees. Press and hold the DOWN arrow and the SET button simultaneously. Once this process starts, the monitor should read “nP”, but you must keep holding these buttons until the reading changes to “L2”. Once you release, the monitor should read “HY”; do not panic. This reading is correct. Press the UP arrow button until you see “OT” on the screen. Press SET, and you should see a number. This number is the current temperature difference. The default is 0. Use the UP or DOWN arrow buttons to increase or decrease the temperature difference to the desired number. Press SET, and the monitor will flash and return you to the home screen. Let the device idle, and it should return its temperature reading screen. Setting the Low Setting on Your Atosa Fridge, Freezer, or Cooler The low setting specifies the lowest temperature the fridge is allowed to reach. Press and hold the DOWN arrow and the SET button simultaneously. Once this process starts, the monitor should read “nP”, but you must keep holding these buttons until the reading changes to “L2”. Once you release, the monitor should read “HY”, do not panic-this is correct. Press the UP arrow button until you see “L2” on the screen. Press SET, and you should see a number–the current lowest temperature setting. Use the UP or DOWN arrow buttons to increase or decrease the low temperature to the desired number. Press SET, and the monitor will flash and return you to the home screen. Let the device idle, and it should return its temperature reading screen. Setting the High Setting on Your Atosa Fridge, Freezer, or Cooler The high setting specifies the maximum temperature the unit may reach and when the unit’s cooling will activate. Press and hold the DOWN arrow and the SET button simultaneously. Once this process starts, the monitor should read “nP”, but you must keep holding these buttons until the reading changes to “L2”. Once you release, the monitor should read “HY”, do not panic; this is correct. Press the UP arrow button until you see “US” on the screen. Press SET, and you should see a number. This number is the current highest temperature setting. Use the UP or DOWN arrow buttons to increase or decrease the high temperature to the desired setting. Press SET, and the monitor will flash and return you to the home screen. Let the device idle, and it should return its temperature reading screen. Setting Your Atosa Unit’s Fan Control You can control your unit’s fans for better control over the evaporator and condenser. However, this segment will only show how to keep the evaporator running even during defrosting. Press and hold the DOWN arrow and the SET button together. Once this process starts, the monitor should read “nP”, but you must keep holding these buttons until the reading changes to “L2”. Once you release, the monitor should read “HY”, do not panic; this is correct. Press the UP arrow button until you see “FC” on the screen. Press SET and the monitor should read “CY”. Press the UP arrow key, and the monitor should read “OY”. Press SET, and the monitor will flash and return you to the home screen. Let the device idle, and it should return to its temperature reading screen. Bonus Tip: Manual Defrosting of Your Atosa Fridge or Freezer You can manually defrost your appliance by pressing and holding the DOWN arrow button for at least three seconds. Purchase All Your Commercial Kitchen Equipment From The FED (Foodservice Equipment Depot) Explore our diverse selection of high-quality commercial kitchen equipment for all your culinary needs. Enjoy a seamless online ordering experience, ensuring fast and frictionless access to professional-grade food service equipment. Shop at our Restaurant Supply Online Store.
Dutch Oven Classic Beef Stew Recipe
Autumn is a great time to try out new recipes and enjoy the earthy, rich aromas of the season. There are lots of delectable options throughout the fall, whether you’re preparing food for a get-together with family, a special supper at home, or simply to appreciate the seasonal foods. Nothing beats a chilly fall or winter day when you return home to a pot of this comforting stew simmering… Dutch Oven Classic Beef Stew recipe & picture by: Classic Dutch Oven Beef Stew Recipe (foodandwine.com) Ingredients 2 tablespoons olive oil 2 pounds boneless chuck roast, trimmed and cut into 1 1/2-inch pieces 1 teaspoon black pepper 1 1/2 teaspoons kosher salt, divided 8 ounces cremini mushrooms, quartered 2 cups sliced red onion (from 1 red onion) 3 medium carrots, cut diagonally into 1/2-inch pieces 6 garlic cloves, smashed 1 cup dry red wine 2 tablespoons all-purpose flour 2 1/2 cups beef stock, divided 1 bundle (tied with kitchen twine) thyme sprigs (about 4 large sprigs) and flat-leaf parsley sprigs (about 2 large sprigs) 2 bay leaves 12 ounces baby gold potatoes (cut any larger potatoes in half) 10 ounces frozen pearl onions (about 1 3/4 cups), thawed 2 tablespoons whole-grain mustard 1 tablespoon red wine vinegar 2 tablespoons thinly sliced fresh chives Directions Heat oil in a large Dutch oven over medium-high. Sprinkle beef with pepper and 1 teaspoon salt. Add half of the beef to the Dutch oven and cook until well browned on both sides, 3 to 4 minutes per side. Transfer the browned beef to a plate. Repeat with the remaining beef. Set beef aside. Add mushrooms to the Dutch oven and cook, stirring often, until browned, about 5 minutes. Transfer to a plate. Add the red onion and carrots to the Dutch oven. Cook, stirring occasionally, until the onion begins to brown, about 5 minutes. Add garlic; cook, stirring often, until fragrant, about 1 minute. Add red wine; cook until liquid has almost evaporated, 6 to 7 minutes, stirring and scraping to loosen browned bits from the bottom of the Dutch oven. Whisk together flour and 1/2 cup of the stock in a small bowl; whisk into the mixture in the Dutch oven until incorporated. Stir in beef, herb bundle, bay leaves, remaining 2 cups stock, and remaining 1/2 teaspoon salt; bring to a boil. Reduce heat to medium-low, cover, and simmer until beef is tender when pierced with a fork, about 50 minutes. Add potatoes; cover and cook until potatoes are tender, about 20 minutes. Stir mushrooms, pearl onions, mustard, and red wine vinegar into the beef mixture. Cook, uncovered, until pearl onions are tender, 8 to 10 minutes. Remove from heat; remove and discard herb bundles and bay leaves. Ladle the stew into bowls and sprinkle with chives. Fall is a great season to try out new recipes and enjoy the hearty, earthy tastes it has to offer! Equipment Required To prepare a delicious Dutch oven-classic beef stew, you’ll need a few essential pieces of food equipment. First and foremost, a durable and generously sized Dutch oven is a must. This heavy, thick-walled pot is perfect for slow cooking and allows you to sear the beef and simmer the stew to perfection. A sharp chef’s knife will be essential for cutting the beef into chunks and chopping vegetables like onions, carrots, and celery. Additionally, a cutting board, wooden spoon, and ladle come in handy for stirring, sautéing, and serving your hearty stew. To ensure your beef stew cooks evenly and retains its flavors, a meat thermometer is an excellent tool to have on hand for checking the meat’s internal temperature. Finally, a cooktop stove or range ovens, along with a heat-resistant trivet or oven mitts, will be used to control the cooking process. With these kitchen essentials, you can create a mouthwatering Dutch oven-classic beef stew that’s both hearty and satisfying. Purchase All Your Commercial Kitchen Equipment From The FED (Foodservice Equipment Depot) Explore our diverse selection of high-quality commercial kitchen equipment for all your culinary needs. Enjoy a seamless online ordering experience, ensuring fast and frictionless access to professional-grade food service equipment. Shop at our Restaurant Supply Online Store.
How to be Noticed in the Foodservice Industry
The food service sector is characterized by intense rivalry and picky consumers in an ever-changing environment. Not only must you provide outstanding food, but you must also stand out from the competition if you want to succeed in this competitive industry. Having the appropriate culinary equipment is one of the essential qualities that can help you stand out. In this blog, we’ll look at how having the appropriate tools can help you stand out in the food service sector. 1. Embrace Innovation: The food service sector’s lifeblood is innovation. You may offer distinctive and intriguing menu items that leave a lasting impact on your clients by investing in cutting-edge commercial kitchen equipment. Innovation sets you apart and keeps your consumers coming back for more, whether it is sous-vide cooking devices for precise cooking or high-speed ovens for speedy service. 2. Prioritize Quality and Consistency: In the restaurant and food service industry, quality is inalienable. For constant, top-notch dish production, your equipment is crucial. Purchase apparatus that enables exact control of cooking temperatures, timings, and techniques. This guarantees that every food you serve consistently meets your high standards. 3. Efficiency Equals Success: The key to success in the food service sector is efficiency. A well-equipped kitchen can considerably streamline your operations because time is money. Invest in tools that will improve your kitchen’s efficiency, cut prep time, and expedite service without sacrificing quality. 4. Customization and Versatility: The appropriate culinary equipment should be able to accommodate your unique needs. Your allies in creating a menu that stands out are customization and adaptability. Look for cooking tools that let you try out different cooking methods, discover international cuisines, and produce unique dishes that set you apart from your competitors. 5. Sustainability Matters: Being environmentally conscious isn’t simply a trend in today’s society; it’s a requirement. Install eco-friendly commercial kitchen equipment to save energy and landfill garbage. This not only makes you stand out as a company that cares about the community, but it also lowers your operating expenses. 6. Training and Skill Development: The best meal preparation tools are only one aspect of the puzzle. The skills of your culinary crew are equally important. Give them the instruction and materials they require to become equipment masters so they may realize the equipment’s full potential. Even the most basic kitchen utensils can be transformed into a culinary marvel by skilled chefs and crew. 7. The Power of Presentation: The way your foods are presented can also be greatly influenced by the kitchenware you choose. Think beyond flavor and concentrate on the presentation of your food. Your food’s aesthetic attractiveness may be a potent marketing tool, luring customers and motivating them to post about their experiences on social media. Conclusion You may streamline your processes, improve the quality of your goods, and provide clients with a standout experience by making an investment in high-quality, cutting-edge, and adaptable equipment. Never forget that the way you cook something can make all the difference, not simply the ingredients you use. If you stock your kitchen with the equipment that allows you to fully express your culinary creativity, you’ll be well on your way to standing out in the food service sector. Purchase All Your Commercial Kitchen Equipment From The FED (Foodservice Equipment Depot) Explore our diverse selection of high-quality commercial kitchen equipment for all your culinary needs. Enjoy a seamless online ordering experience, ensuring fast and frictionless access to professional-grade food service equipment. Shop at our Restaurant Supply Online Store.